“What sandpaper grit should I use?” is one of the most popular questions on every auto forum. It is important to choose the right sandpaper grit for each task to avoid paint damage. There are a lot of different contradictory information online that can be very confusing and overwhelming, especially for beginners who have never done any repair projects before.
After reading some of the posts, I found out that a lot of car enthusiasts are using the wrong grit. I saw some people saying that they’ve used 600-grit or even 400-grit sandpaper to repair clear coat scratches. Big mistake! Sandpaper under 1,500 grit is too rough for the clear coat and will leave small scratches.
Sandpaper “grit” refers to the number of abrasive particles per square inch of sandpaper. The lower the grit number, the rougher the paper. The grit used depends on your repair project. For tough jobs, like stripping the paint, you would need lower-grit sandpaper, and conversely, for clear coat repairs, you would use higher-grit sandpaper.
40 – 80 Grit
I use 40 grit for very rough sanding/grinding before doing the bodywork. This is very coarse sandpaper that will leave rough sanding marks. So, use it only when you really need it like for removing rust or on very deep scratches before applying body filler/bondo.
80 grit works great for shaping body filler. Of course, a lot depends on the quality of the body filler. The better the quality the easier it will be to sand. If you are using a cheap filler, it will take you a while to sand it. So, start with 40 grit, then 80 grit and to even it out 120 grit.
120 – 180 Grit
120 grit is not as rough and is great for flattening out scratches from heavier grit. 180 grit
is great for feathering the edges of the body filler and sanding the spot putty. 180 grit can also be used to remove light rust with minimal scratching
320 – 400 Grit
Both grits are usually used for sanding before primer. 320 grit is great for the final sanding of body filler or spot putty. 400 grit
will work for fine sanding spot putty and for rough sanding a primer although, I prefer 600 grit for that.
In this step, the goal is to make the surface as flat and as smooth as possible before primer application. Every little imperfection will get magnified once the paint is applied. With this in mind, you want to spend most of your time preparing the surface.
To avoid waves and fingerprints, use a sanding block. Block sanding is when you wrap the paper around a backing pad or a block. It will help you evenly distribute hand pressure across the sandpaper making it easier to sand curved surfaces. Always sand using an “X” pattern. Also, avoid spending too much time on one spot.
600 – 800 Grit
600 grit and 800 grit
are used to sand imperfections in the primer before the base coat/paint is applied. Start with 600 grit and work your way up to 800 grit.
1000 – 1,200 Grit
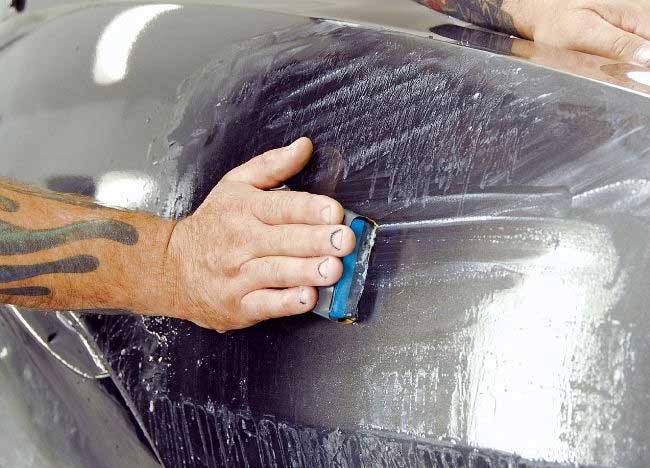
You can use 1,000 grit or 1,200 grit over the base coat to remove imperfections. It is important to use the “wet sanding” technique. Wet sanding is when you soak the sandpaper and spray the surface with a lot of water.
I usually add a few drops of dish soap to make it more slippery. I find that “wet sanding” cuts faster and doesn’t clog the sandpaper. Wrapping the sandpaper around the block will help to make sanding more even.
Even though the 1,200 grit is a fine sandpaper, it will still leave scratches that should be removed with 1,500 or 2000 grit before applying a clear coat.
1,500 – 2,000 Grit
1,500 grit and 2,000 grit are used to sand the clear coat. Both grits are great for removing light clear coat scratches that can’t be removed by rubbing compound and buffing. Use 2,000 grit for final sanding to achieve a smooth surface.
When working with these grits, don’t forget to use the wet sanding method for better results. Soak the sandpaper in cold water for about 10-15 min. Wrap it around a block or backing pad. Spray the repair area with water to keep it slippery.
Also adding a few drops of dish soap to the water will help. Wash off sandpaper after 3-4 sweeps to avoid dust getting in the way. Keep checking the surface with your fingers.
Note: For small projects, you can get an assorted pack of 5 sheets of sandpaper while for bigger projects you will need to buy each grit separately.

Rubbing compound
Rubbing compound is not sandpaper and doesn’t have a grit number, but it also removes imperfections in the clear coat and smooths the surface after 2,000 grit.
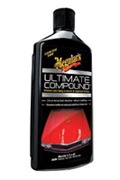
Since paint might be a little dull after sanding, rubbing compound is also used to bring back the shine. My favorite is Meguiar’s Ultimate Compound. You can do buffing by hand or use an electric polisher. I personally like to use Meguair’s Dual Action Polisher because it does an amazing job and is very easy to use even for beginners.

Thanks so much for this info- I’ve been looking all over for a good Guide on Auto Wet Sanding. Thanks again!!!
Hi Cassino. You are very welcome! Thanks for visiting my site.
I tried removing some scratches on my trucks door! I was just using a rubbing compound.Most of the scratches came out after many applications and alot of rubbing.The only problem is on one of the areas that was abit deeper I rubbed to long and maybe abit to hard.Now there is a mark in the clear coat on that small area.Not that noticable but you can see if you look close and some of the scratch is still there! So is that damage that cant really be repaired now? I problably maybe should of used 2000grit sand paper maybe? I have never really done this before.
ROGER
Hi Roger. You definitely should have started with 2000 first and wet sanding, not dry. But it’s ok. If you didn’t sand through the paint you can fix this by slightly wet sanding the area with 2000 grit just to even it out. Sand a little around the scratch too. Next, mask off the panel and spray it with 2 layers of clear coat. Blend the repair area with the old clear coat by using rubbing compound and you are done.
I read your valuable article after doing some stuff. I feel bad. My car had chips, I applied small matching paints to it. Latest after a month yesterday I used 400 grit to sand it over the clear coat. As per your content above that is a big mistake. Later I used the Meguiar’s Ultimate Compound to remove the 400 grit sanding marks. They are not going out. Is there anyway I can fix this ? Help is much appreicated
Hi, someone keyed my car so I tried repairing it with some touch up paint. I did everything the correct way until, I think, evening the paint with the body work.
I used 1,500 grit sandpaper to get it even with the oem paint; however, now there’s a lot of haze and scratch marks around the fixed area. I just applied the clearcoat (after 24 hours) and it definitely looks worse now due to the buffed area.
Would the 1,500 grit sandpaper removed the OEM clear coat? If so, what are my choices? I’d hate to have to repaint the entire car again. Perhaps use the 2,000 over to see it it comes out?
not sure what to do now :(
thanks
It has been very helpful to me. Big thanks to you
hello,
the fiberglass hood of my custom built jeep wrangler has paint crack all over it like a spider web type of crack. what should i do to fix it?
Hi. Great info you have provided. But can you advise on this issue. I have a 5th wheel RV and the sun has faded the paint on the front cone. I have experimented with a 3m fine cut compound on a buffer and the paint is gradually coming back to life but with a lot of effort. However after reading your article can you tell me if I would be better off using a wet 2000 grit before using the compound. Thanks Geoff (UK)
Thanks. i used all these sand paper grids step by step and i fix my quater panel on my brand new 2016 civic.
Thank you so much sharing this wonder full information which saved me lots of $.